Most Tern bikes come in one size but fit riders short or tall. This article will explain how to adjust your bike to fit you best.
Which parts of the bike are adjustable?
Bikes equipped with a Telescopic Seatpost, Andros Stem and/or Speedlifter Stem utilize quick releases for making quick and easy adjustments, without using tools.
That means it’s easy to share your bike with a partner of a different height or tailor your riding position to your preferences hassle-free.
How do I adjust the telescopic seatpost?
The telescopic seatpost has two sections that are adjustable in length. Each section has a quick release.
To open a quick release, pull gently on the quick-release lever. Adjust that section of the seatpost to your desired height, and firmly close the quick-release lever.
Bikes without a telescopic seatpost may have a seatpost that also adjusts using a single quick release. If that is the case with your bike, follow the same directions as above to adjust the height to your preference.
And please note, whatever bike you have, there will be a minimum insertion point indicator printed on the seatpost. For safety reasons, you should always stay within the indicated range when adjusting your seatpost.
How high should I put my saddle?
For comfortable and efficient pedaling, it’s essential to choose the right height for your saddle.
Here’s a simple method for determining the right saddle height:
First, sit on your bike (it’s best to ask a friend to help hold your bike steady). Then, rotate the pedals so that the bottom pedal is in the 6 o’clock position. Put the ball of your foot on the bottom pedal. Your leg should be slightly bent (aim for about 80-90% of full leg extension). If your leg has a bigger bend in it, raise your saddle. If your foot loses contact with the pedal or your leg is completely straight, lower your saddle.
Once you start riding, you may want to make minor adjustments. If you have any knee pain when riding, that’s often a sign that your saddle position is off.
Once you’ve found your ideal saddle height, make a note of the numbered seatpost height indicator printed on the seatpost. Remembering your number will come in handy if someone else rides the bike, and you want to find your fit again quickly.
How do I make other adjustments to the saddle position?
In addition to changing the saddle height, it’s possible to move the saddle forward and backward and to angle it up and down. Getting these adjustments right will greatly improve your riding comfort.
How do I adjust the handlebar height?
Adjusting the Andros Stem

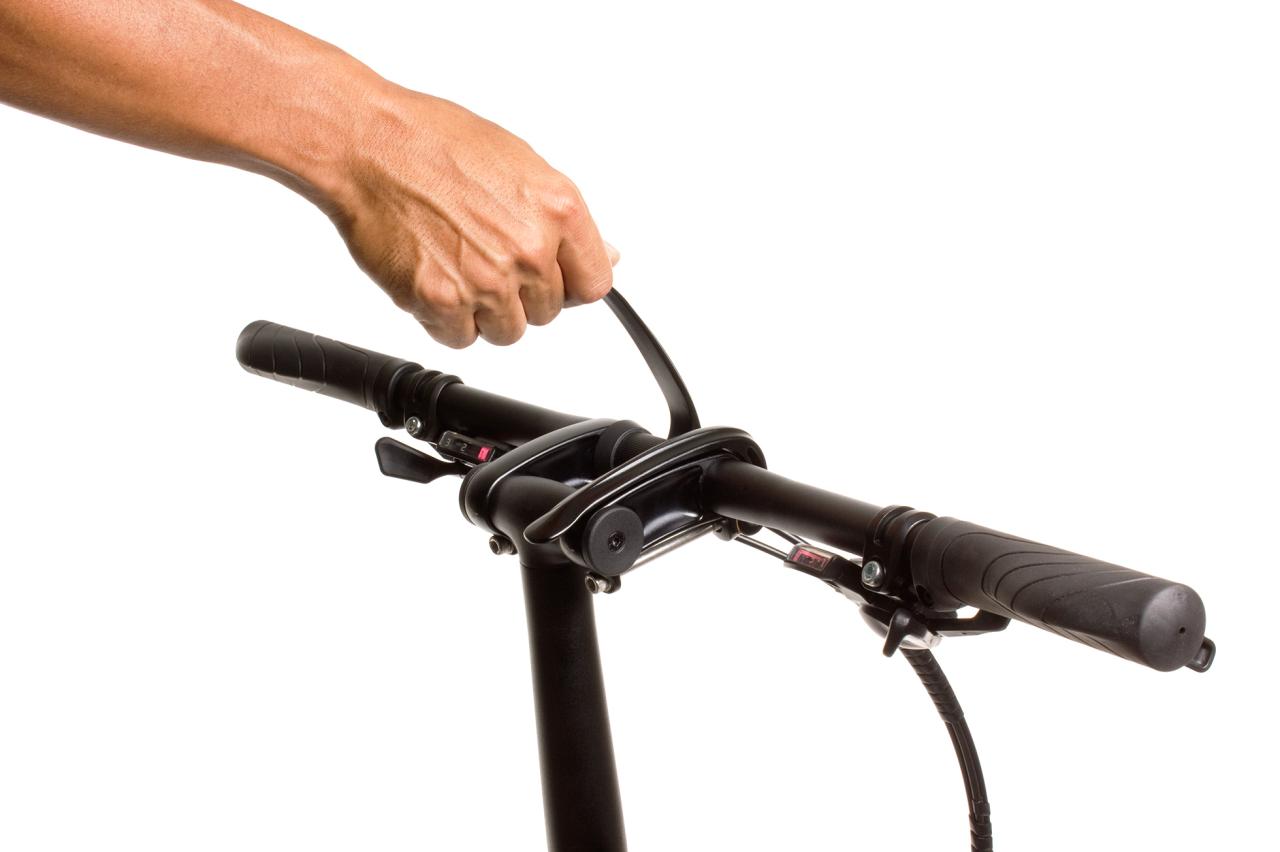
The quick release on the Andros Stem lets you adjust the height, angle, and orientation of the handlebars to find your most comfortable riding position.
To adjust the Andros stem, raise one Andros lever at a time. Adjust the stem and handlebar to your desired position, and then firmly close both Andros levers.
You can set the Andros forward (levers parallel to the ground) for fast road riding, or turn it up to 110 degrees towards you for a more comfortable riding position.
Tips for Adjusting the Handlebar Height
- You may find that the bike steers a little better if you angle the handlebars forward slightly, rather than putting them in the most vertical position.
- If you’ve used the Andros stem to put the handlebars in the highest position and still want more height, it’s possible to switch out your Physis Handlepost for a longer version. Ask your Tern dealer for more information.
Adjusting the Speedlifter Stem

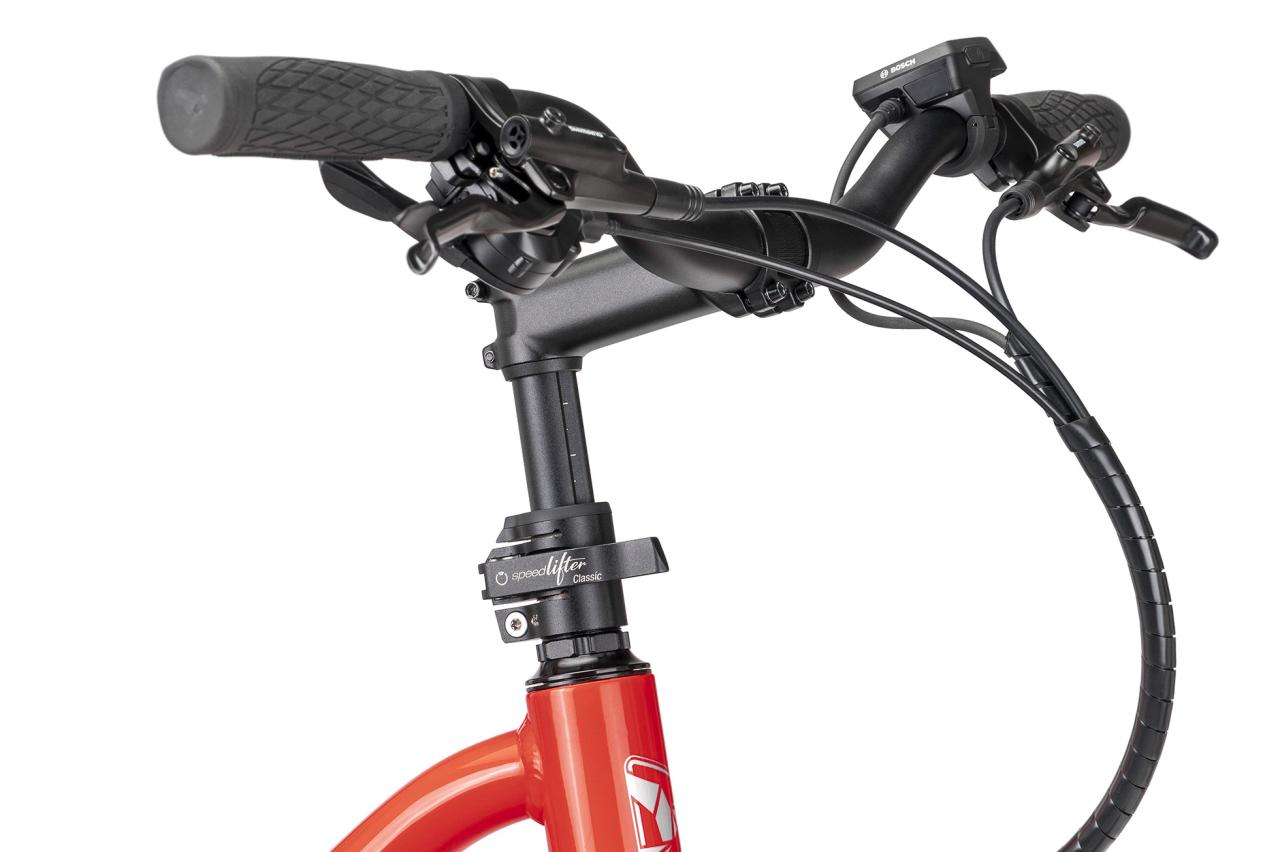
The quick release on the Speedlifter Stem lets you adjust the height of the handlebars to find your most comfortable riding position.
To adjust the Speedlifter Stem, open the quick release by pulling gently on the quick-release lever. Adjust that section of the stem to your desired height, and firmly close the quick-release lever to secure it.
You can also adjust the tightness of the quick-release clamp on the stem. To adjust it, open the quick-release lever and twist the clamp screw nut to tighten or loosen it. If the quick release is not properly closed or adjusted, the stem may drop while riding, resulting in a risk of injury. So it is important to make sure the quick-release clamp is firmly closed before riding.
